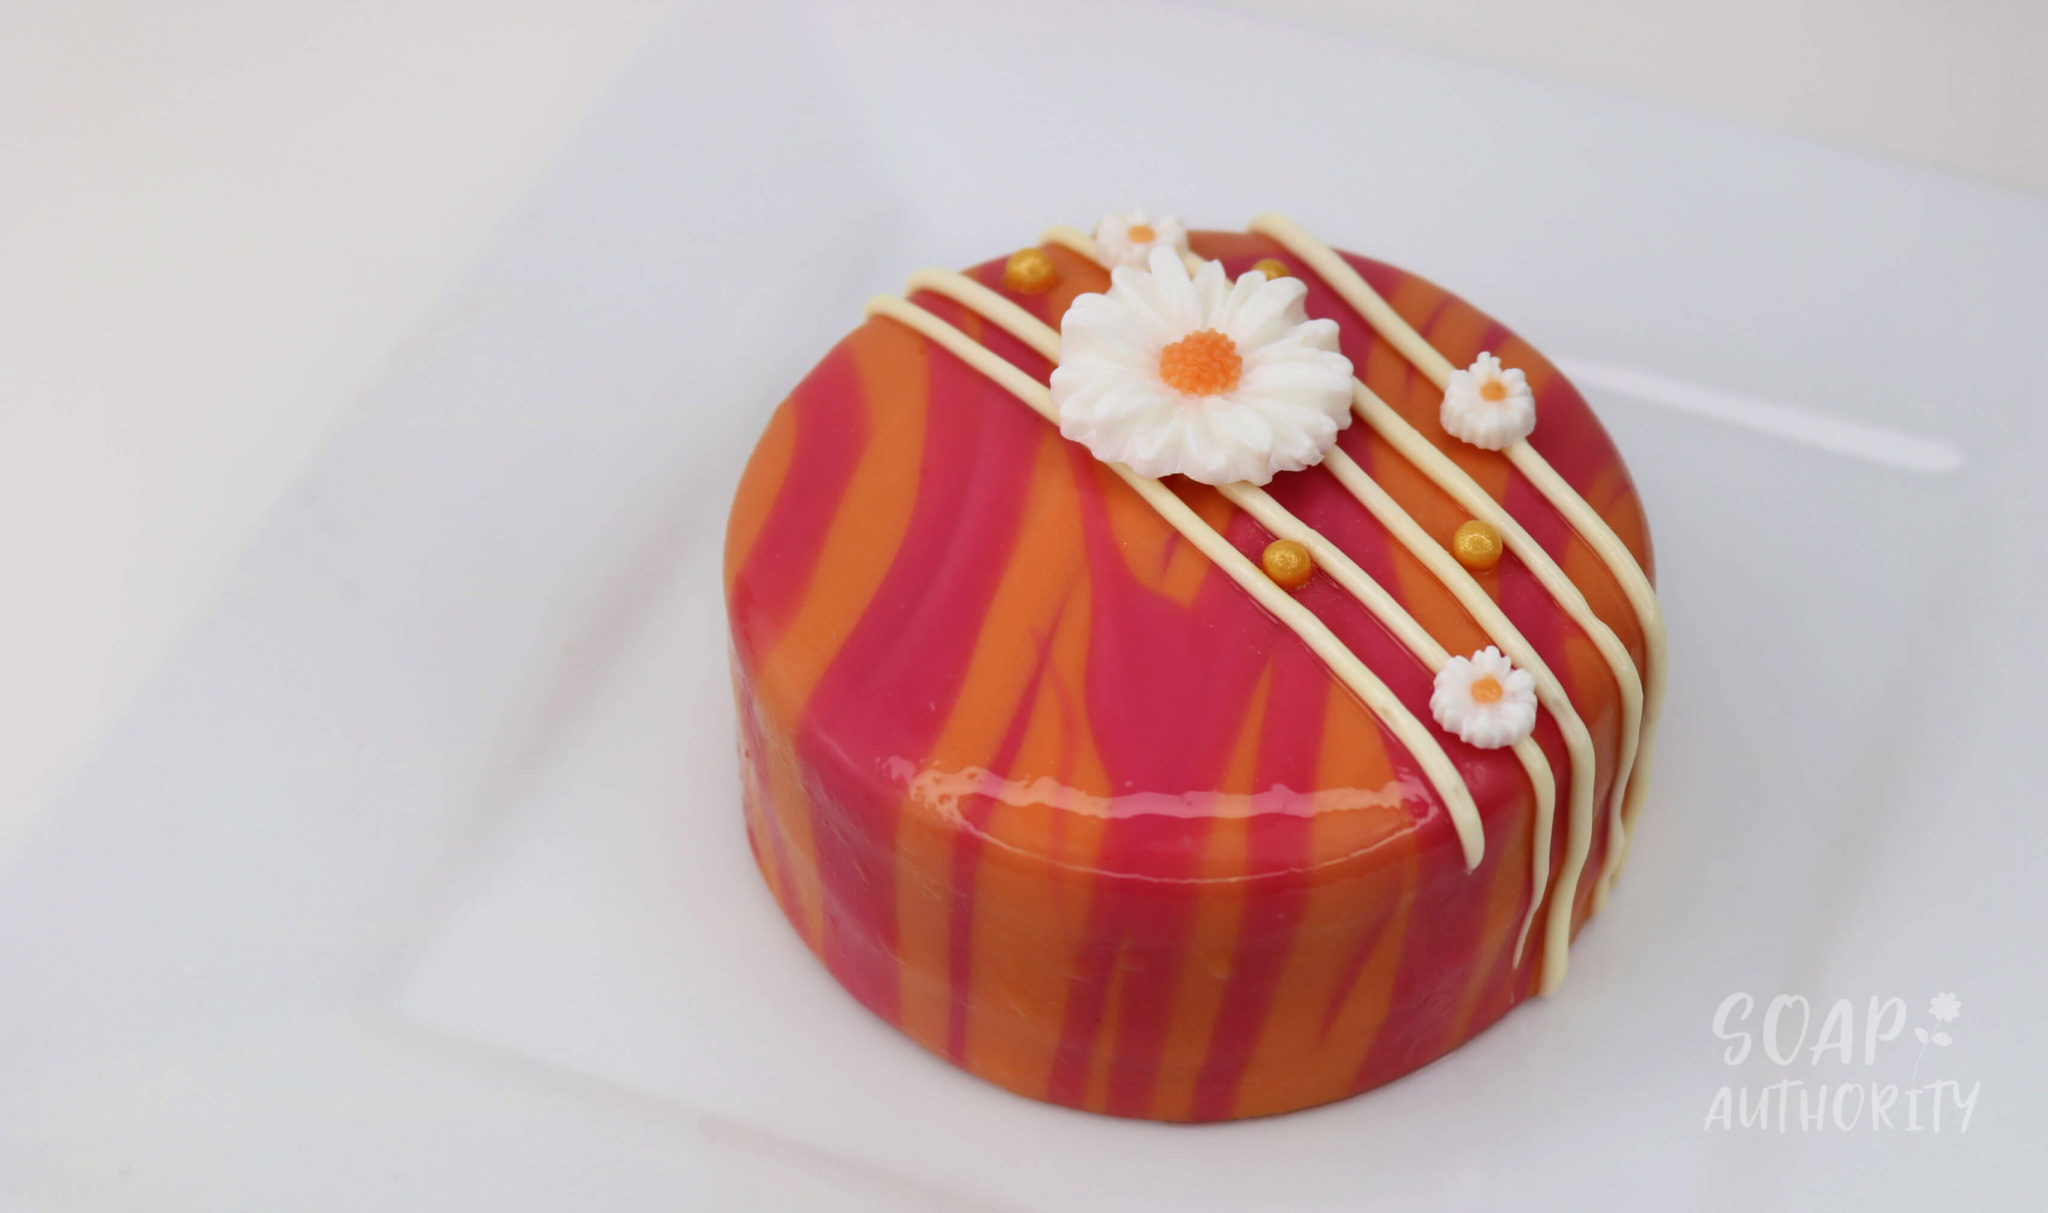
Making Mirror Glaze Soap Cakes with Soap Dough
Making cold process soap by using the mirror glaze technique is similar to the cake decorating technique. This technique uses a combination of cold process soap, soap piping and tiny embellishments sculpted from soap dough.
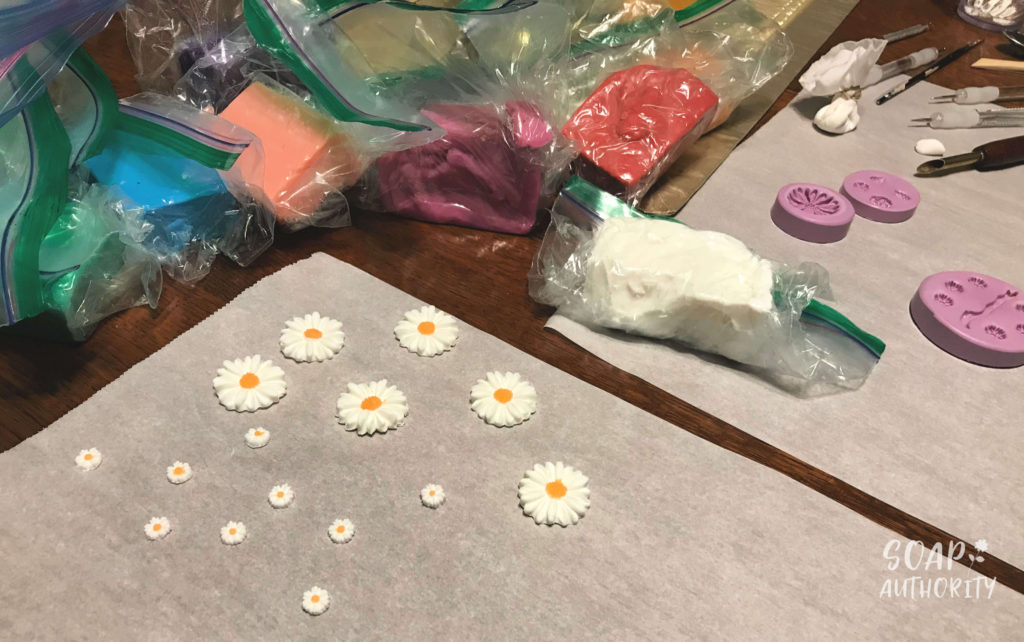
Soap Dough Prep
Using soap dough I made last month and sealed in plastic baggies, I used some custom ordered Sculpey clay molds to shape the daisies. These little soap decorations dried for several days before pouring the main bars of soap.
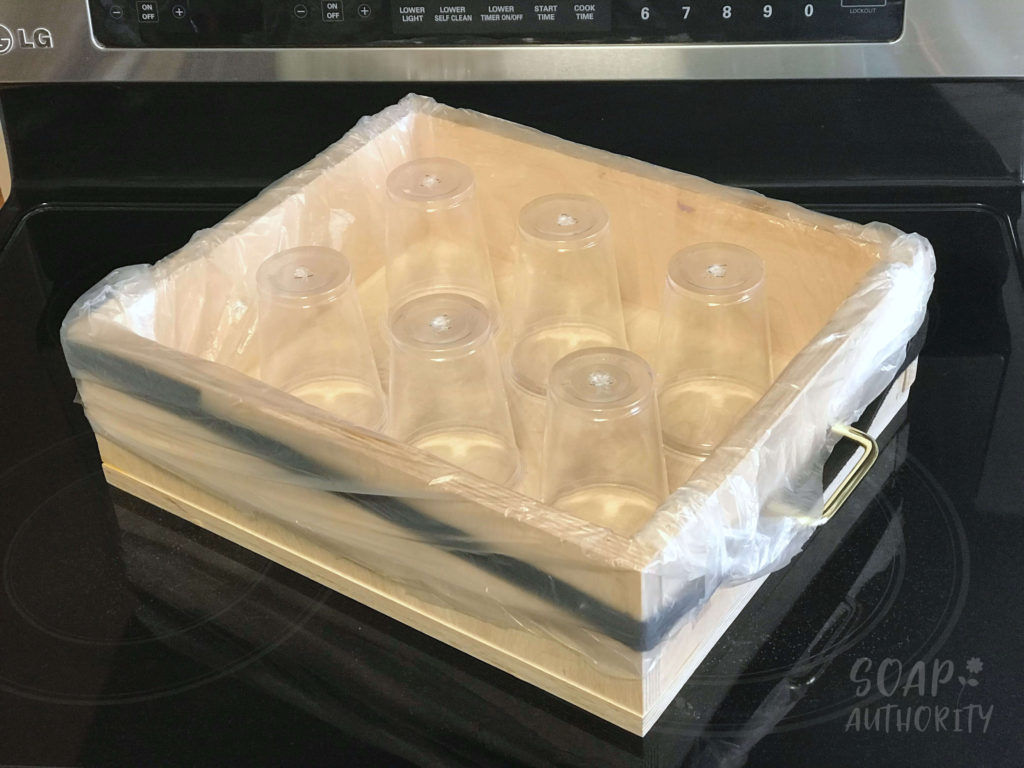
Cup and Skewer Prep
Six clear cups became the stands for the soap cakes. An awl hand tool worked great to poke the right size hole in the bottom of the cup. When pulling it back out of the cup it would make an abnoxiously loud POP, making my indoor rabbits thump (added fun little bonus). 🙂


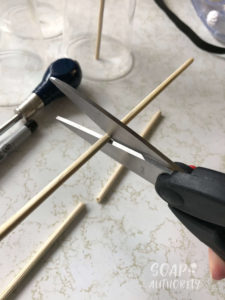
I cut my wooden skewers to size using a pair of kitchen scissors to start the cut. Once indented, I broke them the rest of the way by hand making sure they were shorter than the height of the cup.
BASE RECIPE USED
For the “cake” part of the soap, I used “Old Faithful” from the Soap Queen as my recipe, with a 35% lye solution strength. The fragrance I chose to use was Brambleberry’s Black Raspberry Vanilla. I premixed Nurture Soap’s Raspberry Red Mica in olive oil to color the cake bases. I also posted the recipe below at the end of this post.
Mold
Since I wanted the mirror glaze soap cakes to truly look like cakes, the mold I used was the Crafter’s Choice 3″ diameter six cavity mold. The bars are pretty hefty at 5 ounces each.
Making the base soaps
To make the base soaps, I soaped with my oils and lye solution at 87 degrees. As hoped, the fragrance oil did slow down trace. The reason I used a water discount here is I would also be using that same water discount for the mirror glaze.
By using the same water discount with the base and glaze, I was hoping to have a base and glaze that had a similar hardness and cured at the same rate. More importantly, I needed that water discount for the glaze to help prevent soda ash from forming and ruining the mirror glaze.


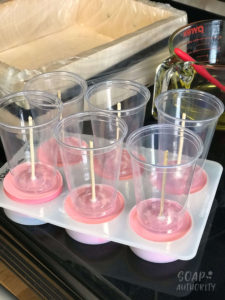
Once the soap had set up for a few minutes, I was able to insert the skewers. I made sure not to push them down so far they broke through the tops of the soap.
This first base batch was left out on the dining table to cure and did develop a light coating of soda ash after 48 hours.
Prepping for drips
Next, I lined my custom made slab mold with a trash can liner to catch the drips. The six hole-poked plastic cups fit nicely inside with plenty of room.
Unmolding the cake bases
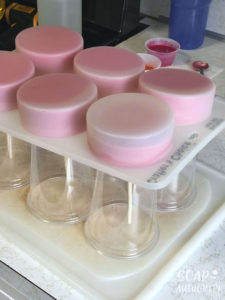
Oh boy, these guys didn’t want to come out of the mold very easily! I did forget to put my sodium lactate in this batch and the skewers really got in the way. I ended up placing the cups right side up over the skewers while they were in the mold. Then, I put an old cutting board on top of the cups so I could flip it over without it flying everywhere.
Once on top of the cutting board and cups, I gently and slowly coaxed them out of the molds. I think that was the hardest part of the whole process. 🙂
Prepping the bases so the glaze would stick
Instead of spraying it with alcohol or wetting the soap right before pouring to make it stick, I tried something a little different. I waited to unmold until the very last minute, right before I mixed up my cold process soap glaze.
Then, as I unmolded each bar, I covered it in plastic wrap. After mixing my glaze, I quickly removed each wrapper. The soap was still soft and sticky, so the glaze adhered really well.

The mirror glaze recipe
No special slow trace recipe was used here. I used the same recipe as I used for the base. Also, I used the same fragrance oil with the addition of some 10x orange essential oil from Brambleberry. The sodium lactate even made it into this second recipe – yay!
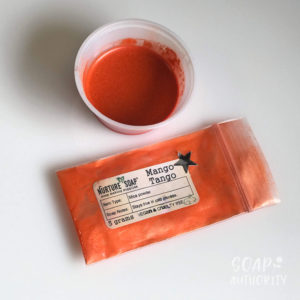
The micas used to color the soap were both from Nurture Soap: Mango Tango Mica and Red Raspberry Mica. Plus, a little soap was left aside for the white icing and colored with titanium dioxide.

Controlling trace
My goal was to have a slow enough tracing soap to pour the glaze properly while avoiding soda ash completely. If my batter was too thick it wouldn’t flow. Too thin, and soda ash might show up.
I was determined to get the batter just right or my geeky little plan wouldn’t work.
Black Raspberry Vanilla fragrance slows down trace and so does orange essential oil. Orange essential oil also is less likely to form soda ash. This was really important, because having the water discount and using the recipe I did, I was virtually guaranteed to have my mirror glaze soap thicken up too quickly. Adding sodium lactate seems to help slow things down, too.
Pouring mirror glaze on the cakes
I stick blended in my colors just as far as I dared to push it, then I poured it over my soap cakes. Following that, I drizzled the white soap icing over one side of each cake using a piping bag.


What saved me from getting soda ash
As one more precaution against soda ash, I preheated my oven on warm (170 degrees Fahrenheit) and put my glazed soaps in the oven. I left it on for 5 minutes, turned it off and turned on the light. The soap sat like this for 30 hours.
I poured my glaze leftovers into my mold and left them on the table. They developed a small amount of soda ash, but my CPOP mirror glaze soap cakes had NO SODA ASH, even after 48 hours!

Read more about preventing soda ash here.
Trimming the drips
The next step was trimming the drips. I used a small paring knife to do this and also removed the middle bumps on the underside so they would sit flat.


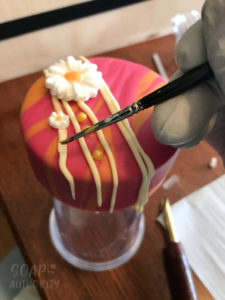
Gluing on the soap dough decorations
The little gold beads are yellow soap dough covered in Shimmer Gold Mica from Nurture Soap. Using a Sculpey dotting tool, I made a tiny crater for each bead. Then, I used my paint brush and water to gum it up before I pushed the little bead in place.
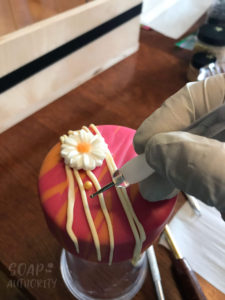
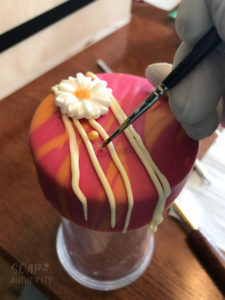

Clear melt and pour soap was used to “glue” the large daisies in place, but the smaller flowers were glued on by using a small paint brush and water. I just rubbed the brush around on both the soap cake and the back side of the flower until the soap got sticky. It’s like when you leave the soap on the side of the tub and practically need a chisel to get it loose. 🙂


Shining up the soap
I didn’t want to use melt and pour soap, so I tried steaming the soap with my hand held garment steamer. It looked shiny for a few seconds then went back to looking like it did before. It had a nice natural sheen, but no where near looking like a mirror glaze.
What worked really well to get a mirror glaze look for the picture, was to spray it with 99% isopropyl alcohol once I had it in place for the photograph. This works nicely as long as the mirror glaze soap cakes are placed on a moisture proof surface.

Photography
The mirror glaze soap cakes were photographed on a piece of white acrylic and for a few of the photos, I used a small white plate for a single soap cake.
The background is a white piece of white bead board purchased at the hardware store and I use a basic lighting set up I bought on Amazon, along with a large ring light for extra light.
The pictures were taken using a Canon Rebel T6i DSLR camera and the lens is an EFS 18-55mm, Macro 0.25m/0.8ft with image stabilizer.
The photos were edited for lighting correction and cropping using both the Snapseed phone app and PicMonkey.
What I liked about this project:
- A very fun idea!
- It didn’t take very long to make the soap
- I got to use my soap dough – woohoo!
- It made me want to binge watch The Great British Baking Show and bake some edible cakes (OK, maybe just eat cake)
What I didn’t like:
- Scraping and digging all the leftover soap off the cups
- It doesn’t have a true mirror glaze, but what can you do? Soap isn’t made to stay that shiny.
A special thanks to…
Amy Warden at Soap Challenge Club for all of her hard work putting together the mirror glaze soap soap challenge. It’s such a great way to meet new friends and push your skills to the next level!
Recipe used for both the base and the glaze:
- 8 oz coconut oil
- 8 oz olive oil
- 8 oz palm oil
- 1 oz castor oil
- 3.6 oz sodium hydroxide
- 6.7 oz distilled water
- 1.5 tsp. sodium lactate added to cooled lye solution
Note: Except for the sodium lactate, all amounts are by weight and not by volume.

What an excellent write-up! Your soaps turned out amazing, and I’m so grateful for your advice for preventing soda ash altogether. That’s pretty incredible! Your glaze looks amazing – so smooth and shiny and I love the daisies! (Yay for using up soap dough!) Great tip about the isopropyl alcohol for the photo shoot also!
Thank you Amy! Soda ash has been one of the few things that drove me crazy forever, and I am happy to share what has worked best for me. The alcohol did work great because it didn’t take long to evaporate off and my soap didn’t suffer from being water logged by my steamer.
These are stunning! I am in the process of trying this technique and I thank you SO MUCH for sharing your experience! I have never seen anything so beautiful. Great job!!!
Hi, Lisa! Thank you for such a nice compliment! I hope the technique goes well for you. It was fun, but definitely messy. 🙂
These are so beautiful! Great job on the design and all the detail in your blog on how you made these. I am impressed with the detail and simplicity.
Thanks, Danielle! I’m glad you like them. 🙂
I love the detail you went into about soda ash, experimenting with shine, etc. And your soap looks AH-MAZ-BALLS! Great work!
I appreciate your compliment, Lisa! The details always help me trouble shoot my soaping issues, so I hope that by sharing others find some answers.
Absolutely amazing blog! Thanks for sharing.
And your soaps are really beautiful.
Thanks, Enas! I’m happy you enjoyed the information. 🙂
I just love your beautiful soaps! Well done!
Thank you, Lynette! I’m glad you like them. 🙂
Your soaps are spectacular! I am about to make a mirror glaze soap and came across your information! Thank you so much. I was so afraid of the soda ash as to me it would totally ruin the look of the soap if it formed. I’m definitely going to take your advice and tips! Thanks again!
Thank you so much, Rose! I hope your soap turns out the way you want it to, and yes that sneaky soda ash likes to pop up where it’s not welcome. I am so glad you found my experience helpful. Good luck!! 🙂
Hi I would like to try this technique and I would like the recipe to experiment
Hi, Dyanne! I’m glad you are giving it a try! There is a link to the recipe in the blog post, but to make finding it easier, I’ve added the recipe to the bottom of the post for you. I used the same recipe for both the base and the glaze. Good luck with your project. 🙂