Knowing when to unmold your cold process soap makes a huge difference in how your finished soap turns out. If you don’t get the timing right, you can end up with a sticky mess or an uncuttable loaf of soap.
So, how long should you wait before unmolding your handmade soap?
The average waiting time before you can unmold your cold process soap is 17-24 hours. If your soap is 100% olive oil soap (Castile soap) then it will need several days to a week or longer. For salt bar soap, you must check it often and it should stay in your mold for 3-14 hours.
Lots of factors affect how long your soap should stay in the mold and it’s not always about your recipe! To understand the perfect time to unmold your soap, there are a several simple things you should know. Plus, I’ll share my favorite tricks that will help ensure you end up with a perfectly unmolded loaf of soap.
When to Unmold Your Cold Process Soap
If you are using a common soap recipe, 24 hours is typically the perfect length of time to wait before unmolding your soap. A common soap recipe usually has no more than 50% soft oils and has at least 30% hard oils.
When you wait 24 hours, you have given your soap a good amount of time to be solid and easy to handle. Plus, it won’t be so long that you run into problems cutting it.
If you’re in a hurry to get it done, you can typically get away with unmolding it at the 17-18 hour mark. You will just need to be more careful. It might be harder to unmold sticking to the sides of the mold, and the corners may be soft.
Soap recipes that are inherently soft
Recipes that have a high percentage of soft oils, like olive oil, or they are a milk-based soap, will almost always need to stay in the soap mold longer. They just take longer to set up and harden enough to handle without smashing them.
Don’t worry if you have to wait up to 2 weeks to unmold your soap. Anything longer than that might indicate something went wrong like your lye was old, or you miscalculated an ingredient.
Unmolding salt bars
Cold process salt bars or spa bars will harden much faster thanks to the large amount of salt they have. The more salt, the less time they should sit in the mold. They need to be checked often and cut just as soon as they are hard enough to unmold. If you wait too long, they will crumble when cut or might even become to hard to cut at all!
It might work better for you and your schedule to pour your salt bars into individual cavity silicone molds. That way you won’t have to worry about getting the timing just right.
With the exception of salt bars, it’s always a good idea to wait longer to unmold your soap if you can. It will make it easier to get out of the mold and you are less likely to get dents or fingerprints in your soap loaf.
Plus, it actually helps prevent soda ash on the sides of your soap by letting your soap cure up a bit before being exposed to the air. Read more about preventing that white, dust-like film called soda ash here.
How to see if your soap is ready to unmold
The key to knowing when to unmold your specific soap is to know how to check it and see if it’s ready. You will be able to tell by how soft and sticky your soap loaf is. If you’re using individual cavity molds, you might need to leave them a few hours longer than if using a loaf mold.
Some soap makers will push on the soap with a finger to see how easy it dents. While that does work and there’s nothing wrong with that technique, I prefer a different approach.
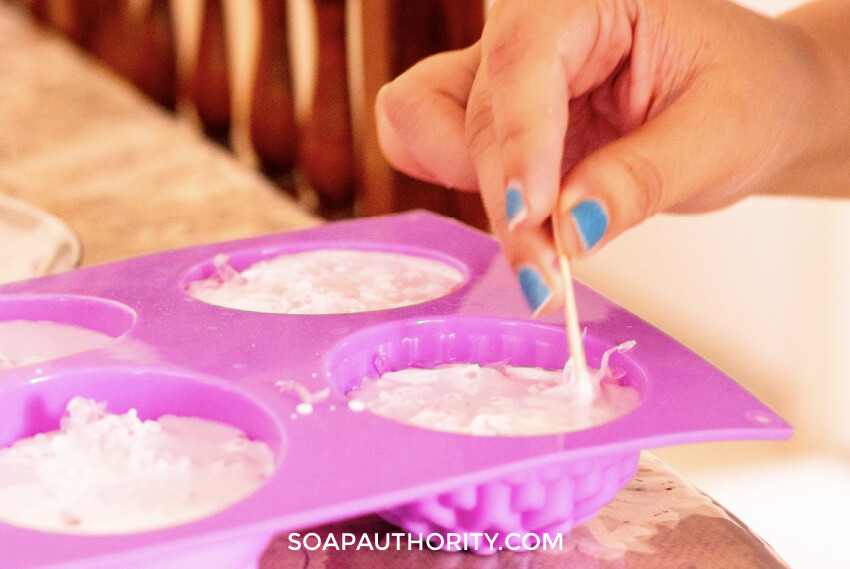
Unmolding soap from a silicone soap mold
One of the easiest ways to tell if your soap is ready to unmold is to gently pull the mold away from the soap and see what it looks like.
If you see that it’s sticking and won’t come loose with a gentle tug – stop! It’s definitely not ready. Give it a few more hours. I will usually wait 3-5 hours longer when it sticks.
Sometimes it will pull away from the soap mold easy enough, but if you look down the side, you will see that the side is rough and rippled looking. Sometimes there will be soap stuck on the mold. It’s still too early to unmold at this point and you will need to wait 2-3 hours longer.
Pro Tip: When you check your soap, only pull one small part of the mold free. That way you can prevent rough sides on your soap. I will usually stick the mold back to the soap by gently rubbing the side of the mold to the soap, then wait.
Unmolding soap from a wood mold with a plastic or freezer paper liner
When you are checking soap that was poured into a wood mold with a paper or plastic liner, you will need to remove the soap with the liner out of your wood mold. Once you’ve got it out of your mold, peel back a corner or small section of the side to see if it’s sticky.
When using freezer paper, I will rarely get a smooth glass-like finish when I peel off the paper. It shouldn’t be gummy, though. If you do find some rippling on your soap after pulling off the paper, use your finger to gently smooth out the side before it starts to dry.
Finger smoothing won’t make it perfect, but it definitely helps.
Document the time you pour and the time you unmold your soap
One of the most important tasks when making soap is documenting what you did and the results you got. You probably don’t want to forget what you did when you get amazing results, and would like to avoid any disasters in the future.
Make sure to write down the time when you pour your soap in the mold and the time you unmold your soap. This will give you a better idea of the perfect time to wait before you unmold your soap – customized just for your recipe.
Was it too soft? Did the corners stick in the mold? Was it hard to push out of the mold? If you answered yes to any of these questions, you should wait longer next time.
Other Factors Affecting the Best Time to Unmold Your Cold Process Soap
While your recipe does play a role in the best time to unmold your soap, there are other things that will change how long you have to wait to remove your soap from the mold.
- What trace level it was at when you poured it
- The temperature your soap was when you poured it
- The type of mold you used
- How well you insulated it
- Whether or not you added heat after it was in the mold – CPOP
- The water discount in the recipe
- Sodium lactate in the lye solution
Let’s go over each one of these briefly, because they can speed up or slow down how fast your soap hardens or saponifies.
How these other things affect your soap unmolding
Trace – Thin trace will take longer to set up and thick trace will speed it up some. It might not make a huge difference, but you will probably notice it.
Temperature – The warmer you pour your soap batter into the mold, the faster it’s going to saponify. Heat makes the chemical reaction go faster.
The mold – Wood molds hold heat better, silicone – not so much. Put your soap in a silicone mold with individual cavities that are further apart and your soap will not retain as much heat. That’s why individual cavity soap molds take a wee bit longer for unmolding.
Insulation – More insulation = more heat = faster saponification. You will notice a difference if you set your soap mold on a wood table vs. a stainless steel table.
Adding heat – if you force gel your soap by putting it on a heating pad or doing CPOP (cold process oven process) in the oven, you will have a harder loaf for unmolding faster. If you refrigerate a milk-based soap to prevent it from scorching, it will need to stay in the mold a lot longer.
Water discount – If you lessen the amount of water in your recipe, your soap will harden faster since there is less water from the get-go.
Sodium lactate – If you add sodium lactate to your lye solution, it can help your soap be slightly harder. Sodium lactate is a salt, which explains why salt bars harden so much faster in the mold.
Keep in mind, all of these variables when you make your soap, because they each can make a difference in the time required before you can unmold your cold process soap.
My Best 3 Tips For a Perfect Soap Unmolding
#1 Embrace Procrastination
Unless it’s a salt bar, you are actually better off procrastinating your soap unmolding a little bit. I know it’s hard to wait, but for all of you procrastinators out there it’s your time to shine.
#2 Give Up Control
Check to see if your soap is ready by how it releases from the silicone mold or liner. If it’s sticking on the sides or corners, it’s not ready. If it doesn’t push out of a silicone mold easily, the bottom is sticky and it’s not ready.
#3 Do a Partial Mold Cure
This is my favorite tip. Expose 2 or more sides of your soap for 30 minutes to 1 hour BEFORE you completely unmold it.
For silicone loaf molds, peel back the sides and put a thin air gap between the soap and the silicone. Gently push the silicone mold away from the soap at the corners. Let it sit to dry a little bit – THEN push your soap out of the mold. This helps prevent a lot of damage and drag marks on the sides.
For freezer paper, peel off the four sides and wait to do the bottom. Then, rotate it on a side and pull the back off. It prevents fingerprints to let it dry on a few of the sides. Make sure to smooth out any rough spots with your finger before they dry.
I make cold process soap and I put it in the freezer because it was too soft. i took it out of the freezer for 24 hours. How long before I take it out of the mold?
Hi, Rhoda! I would wait for the soap to firm up before taking it out of the mold. If it went into the freezer to harden it up, you would want to take it out of the mold while it was frozen. If I have soap that is soft, I just leave it in the mold until it evaporates some of the water and starts to pull away from the sides. If it’s really soft, that can take weeks! It’s painful to wait, but it’s worth it to keep it from getting smashed.